|
Troubleshooting 101
When you suspect that your Motoplat ignition is not functioning properly,there are a few procedures which should
be followed before sending it in for repair. First check to see that all mechanical grounds are solid, rust and corrosion
free. Corrosion and rust can cause deterioration of the ground circuit and in time, destroy the ignition. These grounds include
(1) coil to frame; (2) engine to frame; (3) mounting plate to engine cases; and (4) stator to mounting plate.
Also less thought about, but still part of the grounding circuit for spark, is the path of current from the engine
cases, through the cylinder base and head studs to the spark plug. If these are allowed to get rusty and corroded, it can
effect the ignitions operation.
If you think about it, the ground path from the spark plug to the stator is very complex and leaves a lot of room
for troubles. The current must travel from the base of the plug, to the head, through the head nuts and studs to the cylinder,
from the cylinder and base nuts and studs to the engine cases. In any or all of these mechanical connections, rust and corrosion
can cause a loss of continuity that effectively breaks the ignition circuit. Keep in mind that the head and cylinder base
gaskets are poor if not completely ineffective conductors. That is why it is a good idea to try to eliminate this problem
by first running a ground wire from the stator plate to the coil mounting bracket. Secondly with a painted head you should
be touching the end of the spark plug to the coil mounting bracket when looking for spark. I recommend a serrated washer under
one of the head nuts so when tightened cut into the head through the paint and makes a path directly to the head stud. In
some cases the engine is equipped with a cylinder head support, the problem isn't quite as bad because in this case , you
have a direct connection from the cylinder head and the frame. As long as there is no paint, rust or corrosion interfering
with the connection, the ground should be sufficient. This can also act as a good engine to frame ground, which is equally
as important as a plug to the stator ground. The engine to frame ground is the one people find hard to believe. It is quite
possible for the paint on the engine or frame or both to act as an insulator to the ground circuit. There have been known
cases where brand new motorcycles would not run correctly until the paint between the frame and the engine was removed to
allow a sufficient ground to be formed. Make sure in your restoration that before mounting the engine these contact points
are shiny clean. This will save you hours of troubleshooting at the time you start the engine. If you go through all this
trouble shooting and the machine miraculously heals itself, then the ground is the suspect. If you have changed the coil and
all seems well, the ground may still have been the problem. Sometimes a brand new coil will be just good enough to get you
going again-for a while. Then the problem may still have been the ground. When you changed the coil, you renewed one of the
ground points-coil to frame. I have also seen a couple of flywheels that have lost their magnetism. This is very rare but
I still like to have the entire system in hand before I start to troubleshoot an ignition. I hope all this information has
been of some use. While it may seem like a lot of trouble to go through to solve a problem that may or may not be the problem,
it is definitely the cheapest.
Some more tips
Make sure kill button is disconnected.
On the Mini 6 pole stator if you look into the hold down hole in the flywheel you should be able to see the half moon
metal pickup of the stator and it should be all the way into the groove on the backside of the flywheel. Within 1mm from the
top and from the inside face. If it is the large 6 pole put a dab of grease on the half moon pickup before tightening the
flywheel make sure the grease transfers to the flywheel groove. A measurement can be taken from the flat of the flywheel through
one of the flywheel hold down holes to the red epoxy on the stator. It should be 13mm plus or minus .5mm To check for a spark
take an old NGK B8ES and make the gap about 3 times normal width. Hold the spark plug or secure it to the metal bracket on
the HT coil. If you have a good spark there you should be good but I have seen a head that was painted and it would not provide
a ground for the spark plug until I put a cutting washer under one of the head nuts. If you have received an ignition and
it doesn't work I assure you that it was tested 3 times before it left here including put on my own engine and fired. I can
usually solve any problem over the phone so feel free to call if you have trouble with your repaired ignition.
Testing of the 6 pole stator with red insulators.
Blue to ground = 200 ohms plus or minus 20 ohms
Blue to Black wires = 20 ohms plus or minus 4 ohms
Testing of the 6 pole stator with clear insulators.
Since there is a diode in circuit there is no way to test this stator and it must be sent in.
Testing of the 4 pole stator with red insulators.
Blue to ground = 160 - 200 ohms
Blue to Black wires = 4.7 to 6.8 ohms
Testing of the 4 pole with clear insulators
Since there is a diode in circuit there is no way to test this stator and it must be sent in.
Testing of the 3 pole stator. Internal Flywheel
Since there are too many variations these must be sent in to be tested.
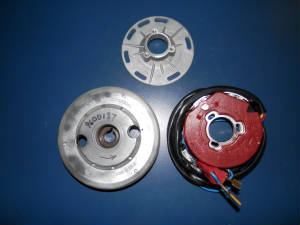
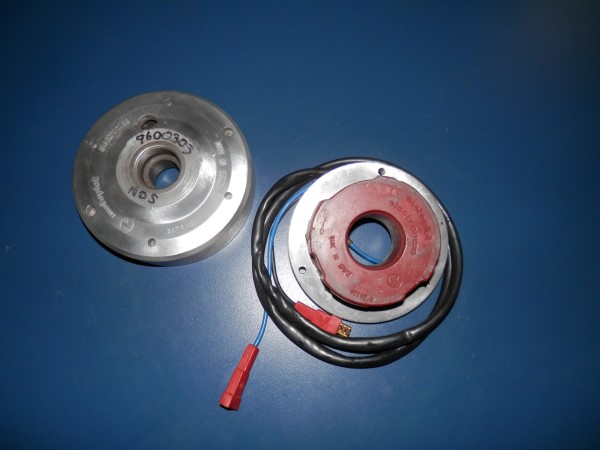
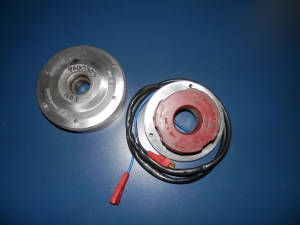
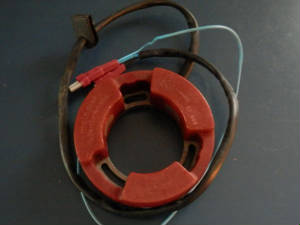
Here are a few other type Motoplats that I have testing instructions for. This is a mini 6. There are two sizes large and
small. They both are the same electrically.
They come in two styles one with a diode and one without.
The one with a diode has clear insulators on the coil ends of the wires. This type can not be reliably tested and should
be sent in. The one with red insulators can be checked. Readings on it should be as follows plus or minus 10 percent.
Blue wire to ground plate = 200 ohms
Black wire to blue wire = 20 ohms
|